Manual#
Command Line Tool#
Using the sphere indicator functions in src/test/test_data/input/, you can generate a simple tet mesh using the following command:
bin/cleaver-cli --output_name spheres -i ../src/test/test_data/input/spheres*.nrrd
Type:
bin/cleaver-cli --help
For a list of command line tool options.
Command line flags:
-a [ --alpha ] arg                  initial alpha value
-s [ --alpha_short ] arg            alpha short value for constant element sizing method
-l [ --alpha_long ] arg             alpha long value for constant element sizing method
-b [ --background_mesh ] arg        input background mesh
-B [ --blend_sigma ] arg            blending sigma for input(s) to remove alias artifacts
-m [ --element_sizing_method ] arg  background element sizing method (adaptive [default], constant)
-F [ --feature_scaling ] arg        feature size scaling (higher values make a coaser mesh)
-j [ --fix_tet_windup ]             ensure positive Jacobians with proper vertex wind-up
-h [ --help ]                       display help message
-i [ --input_files ] arg            material field paths or segmentation path
-L [ --lipschitz ] arg              maximum rate of change of element size (1 is uniform)
-f [ --output_format ] arg      output mesh format (tetgen [default], scirun,
    matlab, vtk, ply [surface mesh only])
-n [ --output_name ] arg            output mesh name (default 'output')
-o [ --output_path ] arg            output path prefix
-p [ --padding ] arg                volume padding
-r [ --record ] arg                 record operations on tets from input file
-R [ --sampling_rate ] arg          volume sampling rate (lower values make a coarser mesh)
-S [ --segmentation ]               the input file is a segmentation file
   [--simple]                       use simple interface approximation
-z [ --sizing_field ] arg           sizing field path
-t [ --strict ]                     warnings become errors
-e [ --strip_exterior ]             strip exterior tetrahedra
-w [ --write_background_mesh ]      write background mesh
-v [ --verbose ]                    enable verbose output
-V [ --version ]                    display version information
Graphical Interface#
You can run the GUI from the command line, or by double-clicking it in a folder.
gui/cleaver-gui.app
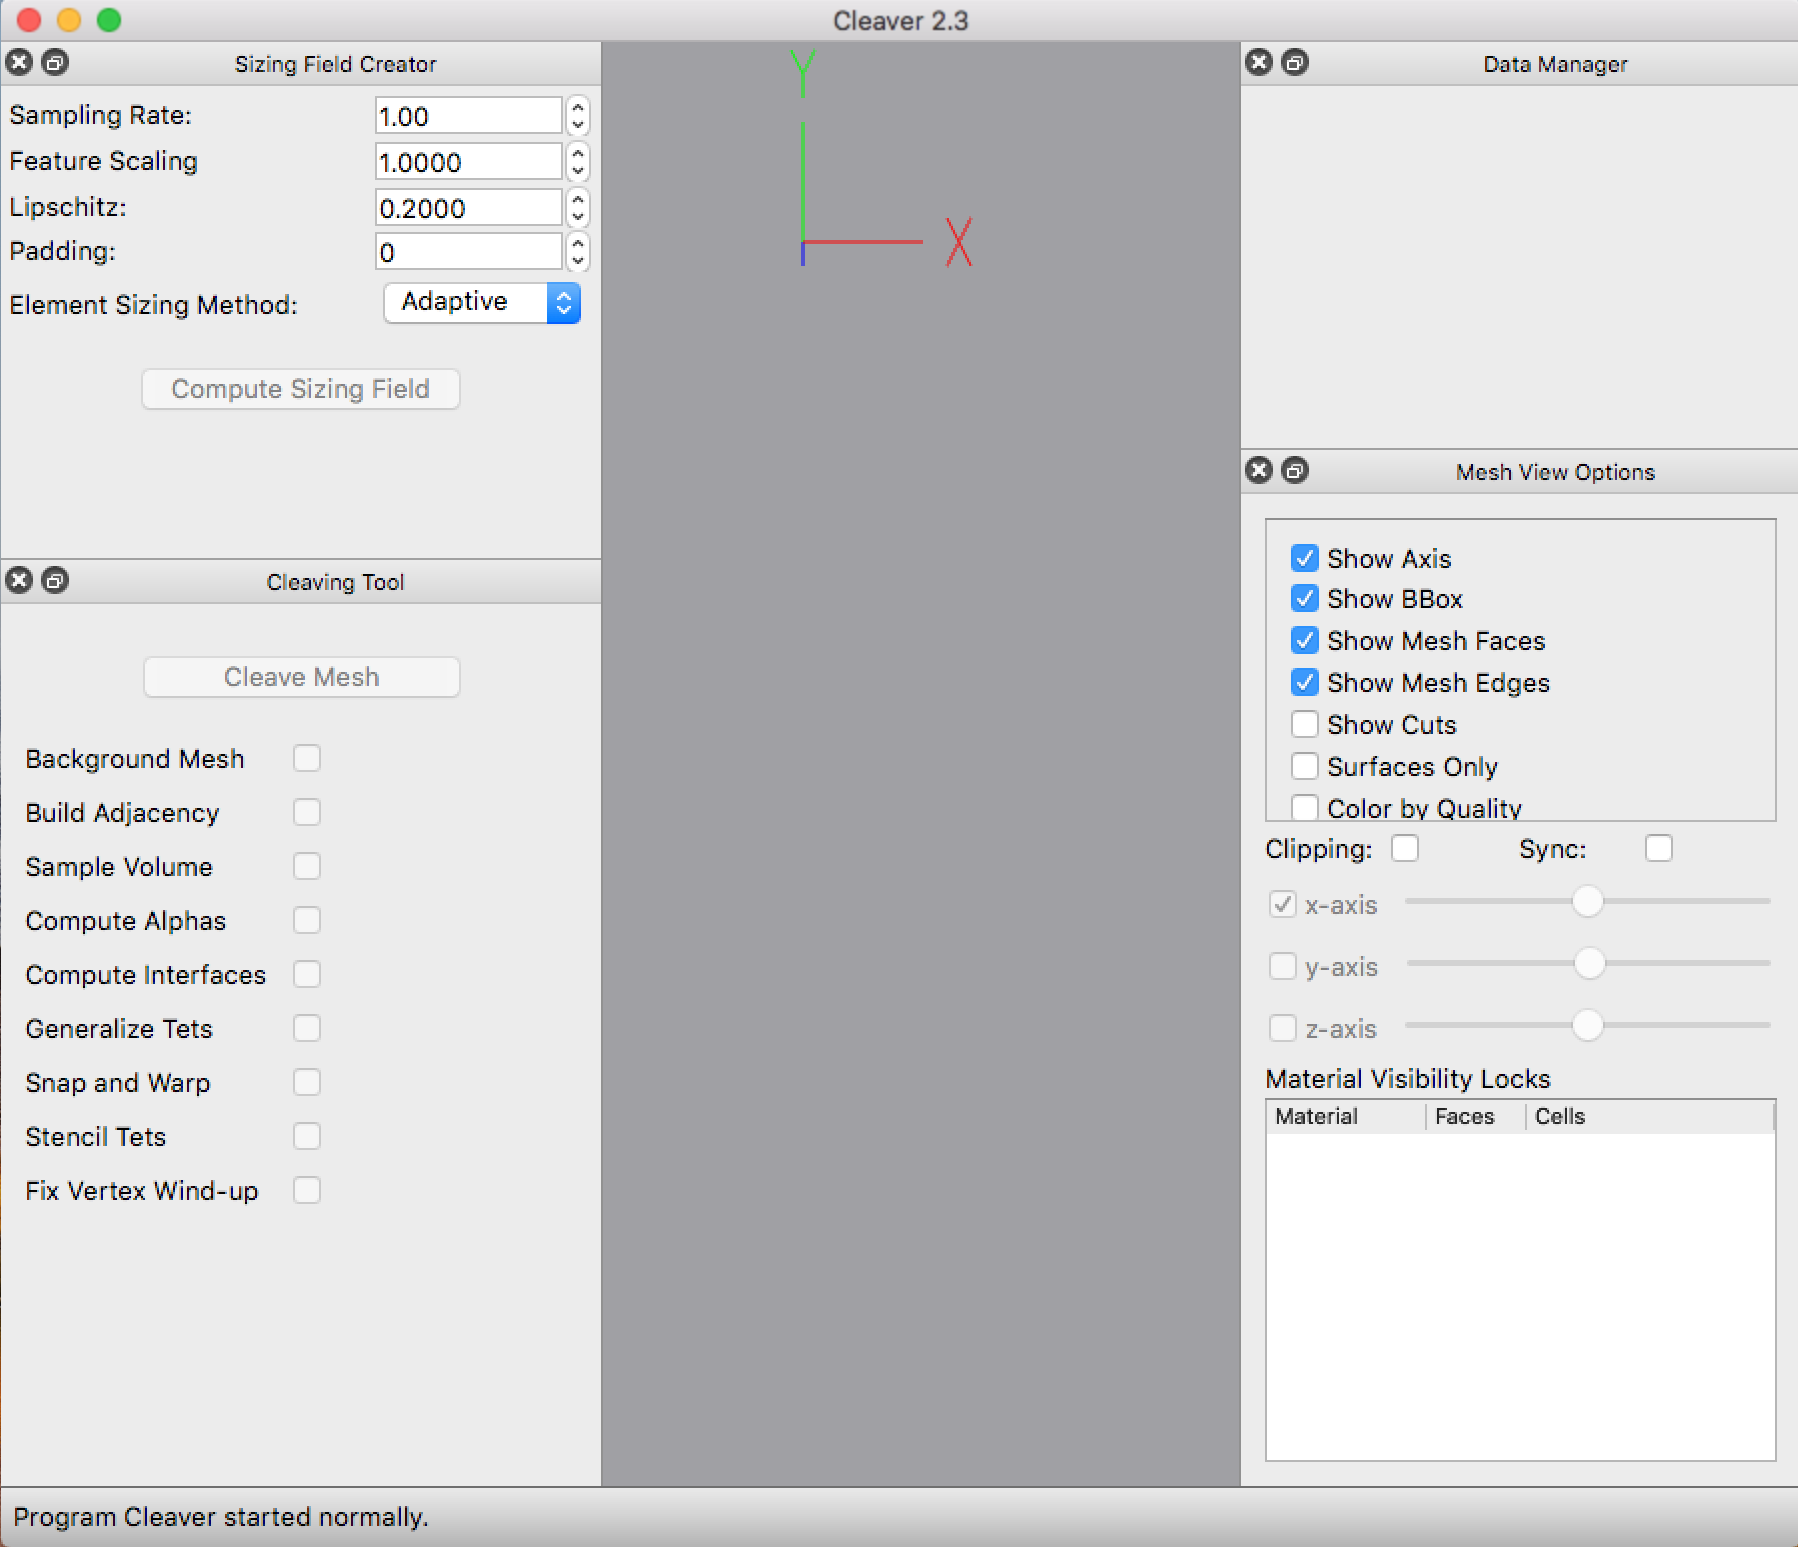
You should see a window similar to this:
 Load the spheres in
 src/test/test_data/input either with ctrl+v or File -> Import Volume, or load your own indicator functions or segmentation file.
Dialog Indicator Function Check: Click the check in the dialog if you are importing individual indicator functions. Blending Function Sigma: Choose a sigma for pre-process smoothing either your segmentation labels or indicator functions to avoid stair-step aliasing.
Sizing Field Creator#
This tool allows a user to set parameters for the cleaving sizing field.
Sampling Rate: the sampling rate of the input indicator functions or calculated indicator functions from segmentation files. The default sample rate will be the dimensions of the volume. Smaller sampling creates coarser meshes. Adjusting this parameter will also affect Cleaver’s runtime, with smaller values running faster.
Feature Scaling: scales features of the mesh effecting element size. Higher feature scaling creates coaser meshes.
Lipschitz: the maximum rate of change of element size throughout a mesh. Helpful for meshes with high and low curvature. Will have no effect on meshes with constant element sizing methods.
Padding: adds a volume buffer around the data. Useful when volumes intersect near the boundary.
Element Sizing Method: select whether to adaptively/nonuniformly resize tetrahedra for more detail at volume interactions, or to keep tetrahedra sizes constant/uniform based on the sample scale.
Compute Sizing Field: once you have your desired parameters, click this to create the sizing field. This is assuming a volume has been loaded (
ctrl+v or File->Import Volume). New information will be added to the Data Manager at each step. If a sizing field is not created here, a default one will be created for you automatically before cleaving.
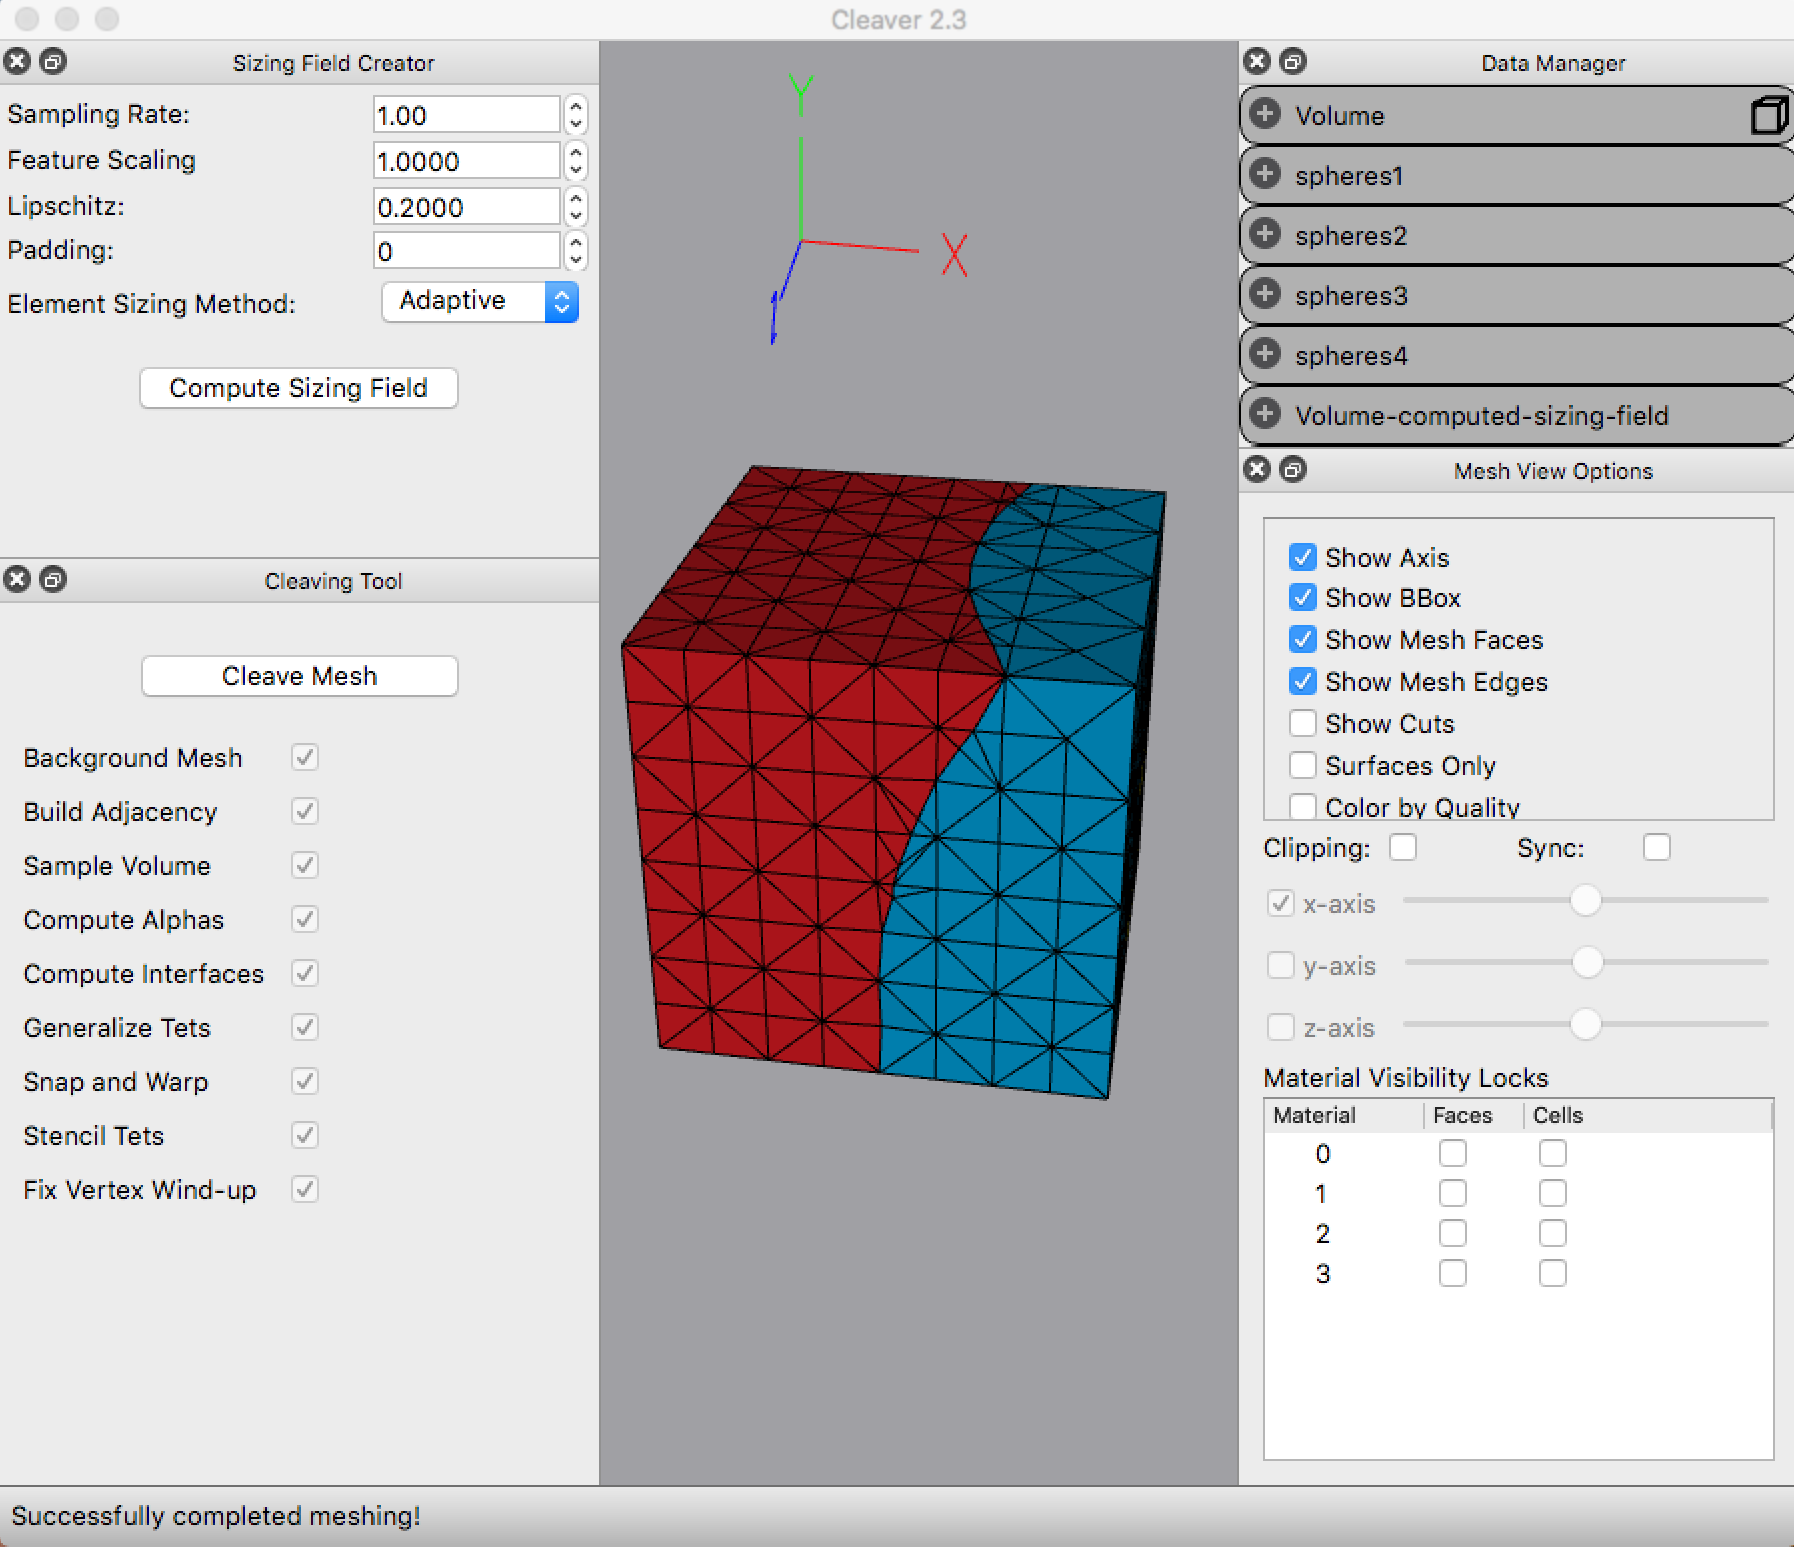
Cleaving Tool#
This tab runs the cleaving algorithm and displays steps that have completed.
Cleave Mesh: Run the cleaving algorithm. The steps are shown as complete with the check below. The rendering window will also update with each applicable step.
Data Manager#
This tool displays information about meshes, volumes, and sizing fields loaded and created.
Mesh: a mesh will have number of vertices, number of tetrahedra, and the min/max mesh boundaries.
Volume: a volume will display the dimensions, origin, number of materials, the file names, and the associated sizing field (if any other than the default).
Mesh View Options#
Here are are a number of options for visualizing the generated mesh.
Show Axis: Toggle the rendering of the coordinate axis (x-y-z).
Show BBox: Toggle the rendering of the mesh/volume bounding box.
Show Mesh Faces: Toggle the rendering of the mesh’s faces.
Show Edges: Toggle the rendering of the mesh’s edges.
Show Cuts: Toggle the rendering of nodes where cuts took place.

Show Surfaces Only: Toggle the rendering of the tets (volume) vs. the surface representing the interface between volumes.
Color by Quality: Toggle the coloring of faces based on the quality of the tet vs. the material itself.
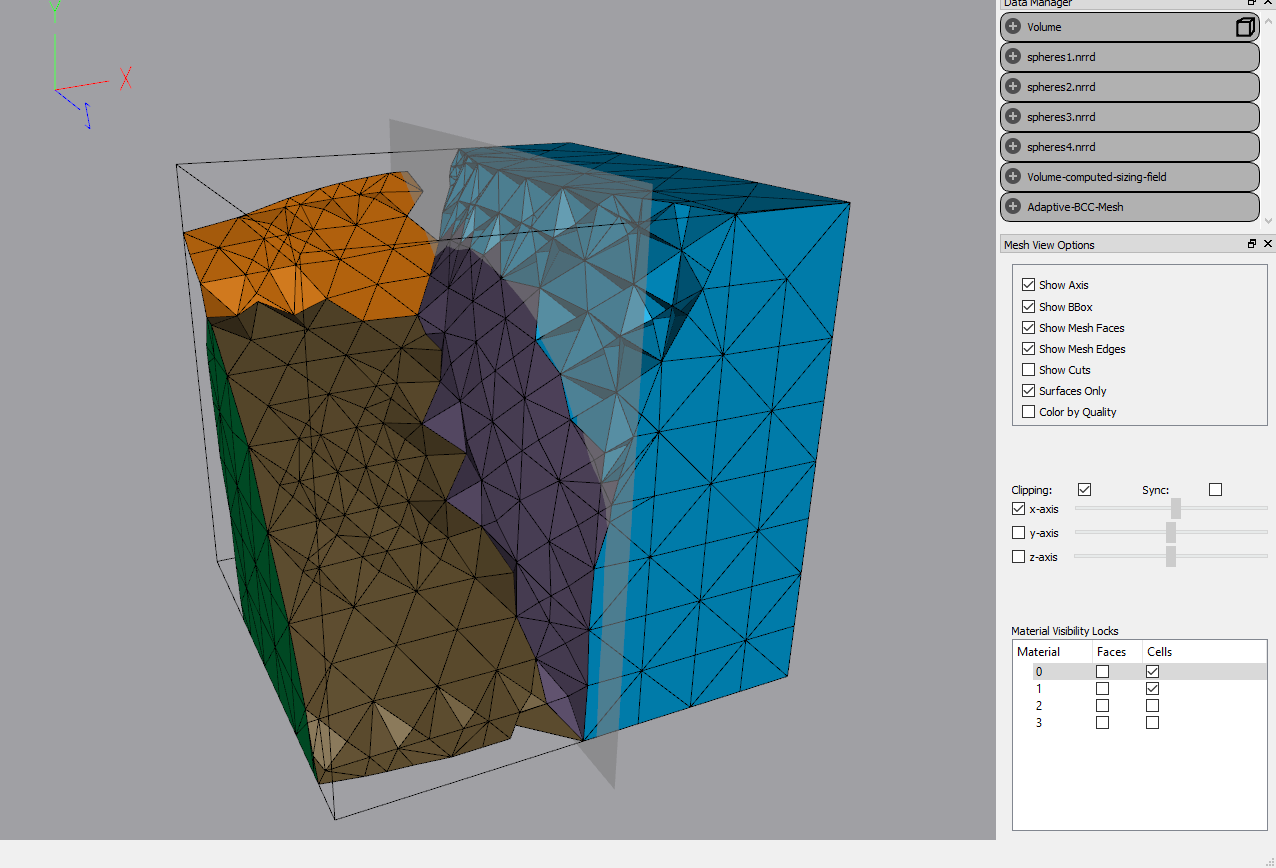
Clipping: Toggle the clipping of tets based on the below sliders.
Sync: When checked, faces will update during slider movement (slower). Otherwise, faces will update once the clipping plane has stopped moving (mouse is released).
X-Y-Z Axes: Select which axis to clip the volume. The associated slider will permit clipping from one end of the bounding box to the other.
Material Visibility Locks: A list of the materials is here. When the faces of a material is locked, clipping is ignored for that material and it is always visible. Locked cells refers to tets/volumes that will remain visible despite the clip.
View#
Toggle view of the Sizing Field, Cleaving, Data, and Mesh View tools.
Help#
Show information and documentation about Cleaver, as well as issue reporting.
Cleaver Library#
To include the cleaver library, you should link to the library build, libcleaver.a or
cleaver.lib and include the following headers in your project:
##CMake calls
include_directories(Cleaver/src/lib/cleaver)
target_link_libraries(YOUR_TARGET ${your_libs} Cleaver/build/lib/libcleaver.a)
There are other headers for different options,
such as converting NRRD files to cleaver indicator functions.
You may wish to write your own indicator function creation methods.
The basic set of calls are in the following code snippet:
#include <cleaver/Cleaver.h>
#include <cleaver/CleaverMesher.h>
...
  //obtain your image fields before this line
  cleaver::Volume *volume = new cleaver::Volume(fields);
  cleaver::CleaverMesher mesher(volume);
  cleaver::AbstractScalarField *sizingField =
    cleaver::SizingFieldCreator::createSizingFieldFromVolume(
         volume,
         (float)(1.0/lipschitz), //defined previously
         (float)sampling_rate,   //defined previously
         (float)feature_scaling, //defined previously
         (int)padding,           //defined previously
         verbose);               //defined previously
  volume->setSizingField(sizingField);
  mesher.setRegular(false);
  bgMesh = mesher.createBackgroundMesh(verbose);
  mesher.buildAdjacency(verbose);
  mesher.sampleVolume(verbose);
  mesher.computeAlphas(verbose);
  mesher.computeInterfaces(verbose);
  mesher.generalizeTets(verbose);
  mesher.snapsAndWarp(verbose);
  mesher.stencilTets(verbose);
  cleaver::TetMesh *mesh = mesher.getTetMesh();
  mesh->writeMesh(output_path + output_name,
    output_format, verbose);
...
Look at the Cleaver/src/cli/mesher/main.cpp file for more details on how to apply and use the different options of the cleaver library.
Known Issues#
On larger data sets with a potentially high number of quadruple points (> 3 material fields), some functions are failing to ensure valid tets and meshes, causing bad tets in the final output. This code is being debugged now for a future release.
The graphics cards documented in System requirements are known to not support Cleaver.